
Crown molding is the cherry on top when it comes to interior detailing. But if you’ve ever tried to tackle this task, you might have realized that cutting crown molding is no walk in the park. Fear not, however! With the right tools, specifically, a miter saw and some clear instructions, you can master this crafty cut. Let’s delve into the steps, tips, and tricks to achieve perfection.
Table of Contents
How Crown Molding Angles Work
Crown molding is characterized by its profile, which is designed to sit at an angle between the wall and ceiling. Understanding these angles is the first step toward mastery.
The Basics
First of all, it adds an elegant touch to any room. But before you start cutting, it’s essential to understand its profile. Crown moldings are not flat—they’re designed to sit at a specific angle, typically 45 degrees to the wall and ceiling. This means when you’re cutting, you’re dealing with two angles simultaneously: the angle at which the molding meets the wall (its spring angle) and the angle of the cut you’re making.
Why Angles Matter
Angles are paramount because they determine how the molding fits. Get them wrong, and it won’t align properly. The miter saw’s settings should be adjusted to match the spring angle, ensuring a snug and seamless fit. By understanding these angles, you’re halfway to making a perfect cut.
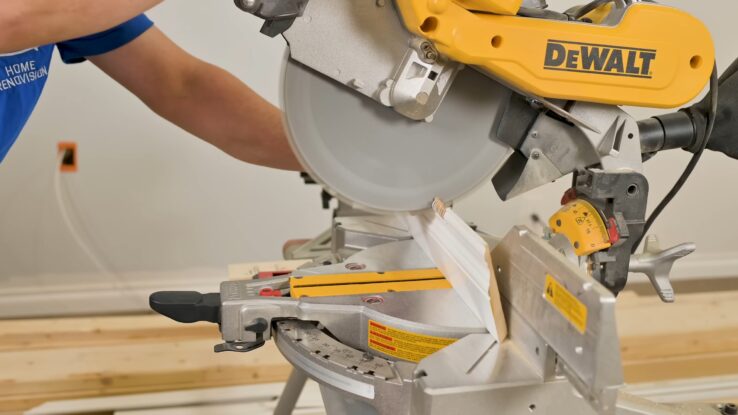
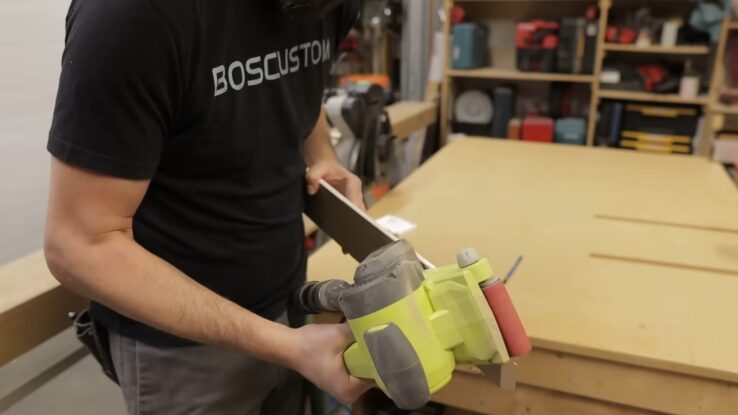
Setting Up Your Miter Saw
Your miter saw is the hero of this story. But, like any hero, it needs some prepping to save the day.
Choosing the Right Blade
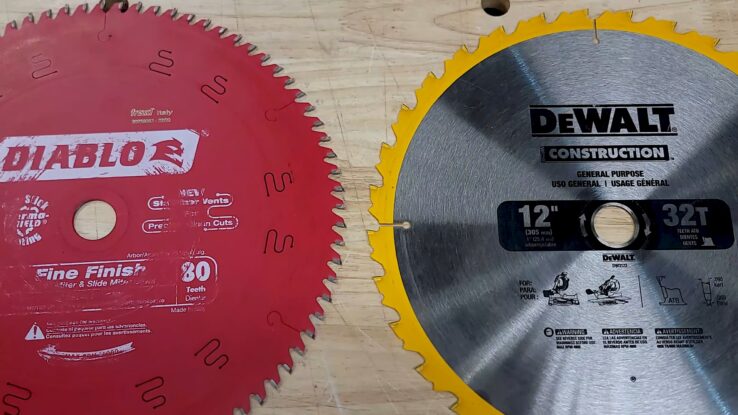
Not all blades are created equal. For crown molding:
- Opt for a blade with a higher tooth count, around 60-80 teeth, for a smoother finish.
- Carbide-tipped blades offer longevity and sharpness.
- Ensure your blade is sharp; a dull blade can tear the wood, leading to uneven cuts.
Calibration is Key
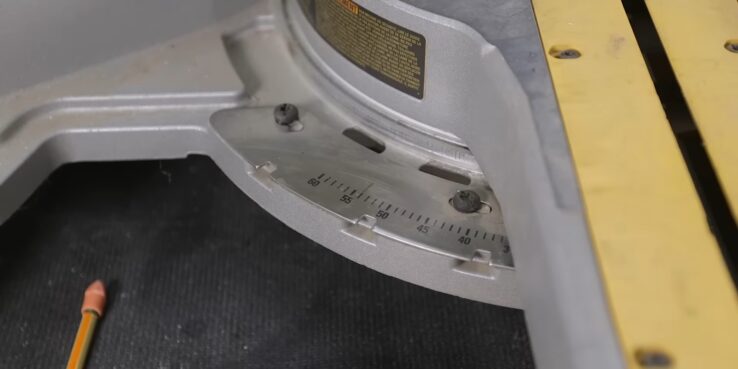
Before you start cutting, ensure your miter saw is calibrated. This means:
- Checking the blade for squareness against the fence.
- Ensuring the miter and bevel angles are set correctly.
- Regularly maintaining your saw to avoid unnecessary mistakes.
The Actual Cutting Process
Armed with knowledge and a prepped saw, you’re now ready to dive into the cutting process.
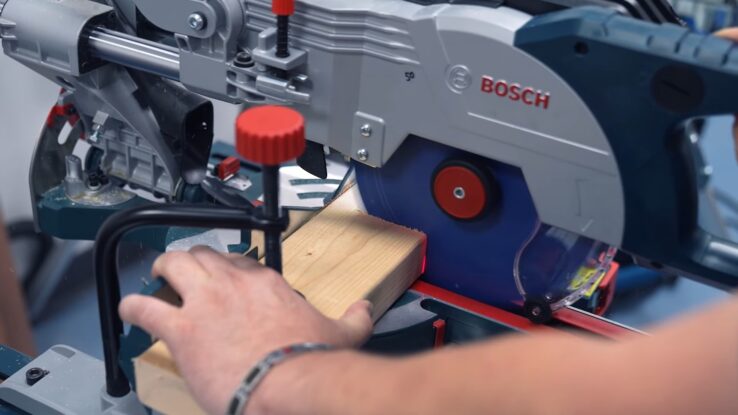
Cutting Flat
This is the easiest method. Place the molding flat on the saw table:
- Adjust the miter and bevel angles as needed.
- Hold the molding securely against the fence, and make your cut.
Cutting in Position
Alternatively, you can cut the molding as if it’s already in its place on the wall:
- Tilt it so its bottom edge is against the saw’s fence.
- Set the miter angle to the desired wall corner angle divided by two.
- Make your cut while ensuring the molding stays firmly in place.
Making Different Types of Cuts
Crown molding corners are typically either “inside” or “outside.” Each requires a distinct approach.
Cutting Inside Corners
Inside corners are where two walls meet, forming a concave angle:
- Use a coping saw after making a miter cut to follow the molding’s profile.
- This creates a tight fit with the next piece of molding.
Cutting Outside Corners
Outside corners are convex, where walls form an outward point:
- A compound cut is required here, adjusting both the miter and bevel angles.
- Ensure both pieces fit snugly for a seamless look.
Fine-Tuning and Troubleshooting
Even with precision, sometimes we need a little touch-up. Let’s troubleshoot common issues.
Addressing Gaps
Even with perfect cuts, your walls aren’t always straight. If gaps appear:
- Use caulk to fill in small gaps.
- For larger gaps, scribe the molding to fit the contour of the wall.
Fixing Overcuts
Mistakes happen. If you’ve overcut:
- Wood filler can help patch small overcuts.
- If the error is too significant, it’s best to recut a new piece.
Safety First
Amidst the excitement of crafting, never forget the importance of safety.
Essential Safety Gear

When working with a miter saw, always wear the following:
- Safety goggles to protect your eyes from flying debris.
- Ear protection to guard against loud noises.
- A dust mask to keep sawdust out of your lungs.
Miter Saw Safety Tips
Beyond gear, always:
- Keep your hands well away from the blade.
- Never bypass the saw’s safety features.
- Ensure your workspace is well-lit and free from distractions.
Finishing Touches
After the cuts are done, some final touches ensure your molding looks exquisite.
Sanding the Edges
After cutting, some edges might be rough. Use fine-grit sandpaper to:
- Smooth out any rough spots.
- Round sharp edges for a better fit.
Painting or Staining
Depending on your room’s aesthetic:
- Paint the molding to match your room’s color scheme.
- Or stain it to highlight the wood’s natural beauty.
Installing Your Molding
With your pieces perfectly cut, it’s time to get them up on the wall.
Securing in Place
To secure your molding:
- Use finish nails, ensuring they penetrate both the molding and the wall studs or ceiling joists.
- Avoid nailing too close to the edges to prevent splitting.
Sealing the Joints
Once up, you might notice seams where pieces join:
- Apply a thin bead of paintable caulk to seal these joints.
- Smooth with your finger for a seamless look.
Celebrate Your Achievement
After all the meticulous work, take a moment to step back and admire.
The Value of DIY
By cutting and installing your crown molding:
- You’ve added value to your home.
- You’ve also gained a new skill, and with practice, it only gets easier!
Next Steps in Home Improvement
With this task mastered:
- Consider other molding projects like baseboards or chair rails.
- Look into different woodwork that can elevate your home’s interiors even more.
Resources and Further Learning
Mastery is a journey. Here are some resources to deepen your understanding.
Books and Manuals
Several publications offer in-depth insights:
- “Trim Carpentry and Built-Ins” by Clayton DeKorne and Andy Engel.
- “The Very Efficient Carpenter” by Larry Haun.
Online Platforms
For visual learners:
- Websites like YouTube offer countless tutorials.
- Join forums or online communities where experts and enthusiasts share tips and tricks.
FAQs
Why is cutting crown molding considered confusing?
It can be tricky because of the angles involved. Ensuring the correct angle for both inside and outside corners requires precision and understanding of the molding’s profile.
How can I determine the type of crown molding I have?
There are numerous sizes and styles. The most common type found in lumber yards and big box stores has a profile where the inside angles are 38° and 52°. Measure the rise (height when installed) and run (depth when installed) to determine your molding’s angles.
What are the “magic numbers” for setting up a miter saw to cut standard 38/52 degree crown molding?
For basic 90° corners, set the MITER ANGLE to 31.6° and the BEVEL ANGLE to 33.9°. Most miter saws have these angles specifically marked.
How do I cut inside corners for crown molding?
Inside corners are formed on the interior of a room. When cutting for an inside corner, ensure that the bottom of the molding is longer than the top and the back side is longer than the front.
How do I cut outside corners for crown molding?
Outside corners protrude into a space. When cutting for an outside corner, ensure that the top of the molding is longer than the bottom and the front side is longer than the back.
Can I cut crown molding laying flat in a miter saw?
Yes. This method can be especially useful if your saw is too small to cut the molding standing up or if you prefer this approach.
What if my corners are not 90 degrees?
Cutting for corners that aren’t 90 degrees can be more complex. You might need to refer to specific charts or use trigonometry to determine the correct angles.
How do I splice two pieces of crown molding together?
Splicing involves joining two pieces seamlessly. Detailed instructions and techniques can be found in specialized guides or tutorials.
What type of nail gun is best for installing crown molding?
After cutting, it’s essential to use the right tools for installation. Specific nail guns are recommended for moldings and trims to ensure a secure fit.
Final Words
Cutting crown molding angles with a miter saw might seem daunting initially, but with patience, the right tools, and this guide, you’re well-equipped to elevate any room in your home. Here’s to your next DIY project!